Saturday, 9-February-2019
Vag Tacho 2.6-3.01 cable FIX
EN
Because I bought same VAG Tacho clone that last only one start, I will try to give you some “how to..”.
One good place, that I found the needed files was: “digital-kaos.co.uk”
Lets start:
How to know the main chip is screwed: You get 12 volts error, or some connecting errors.. , K-line short circuit…
What you need: some skills, EEPROM flashing equipment, dump files
FILES:
- you can get here
HARDWARE
- open the cable and you see that:
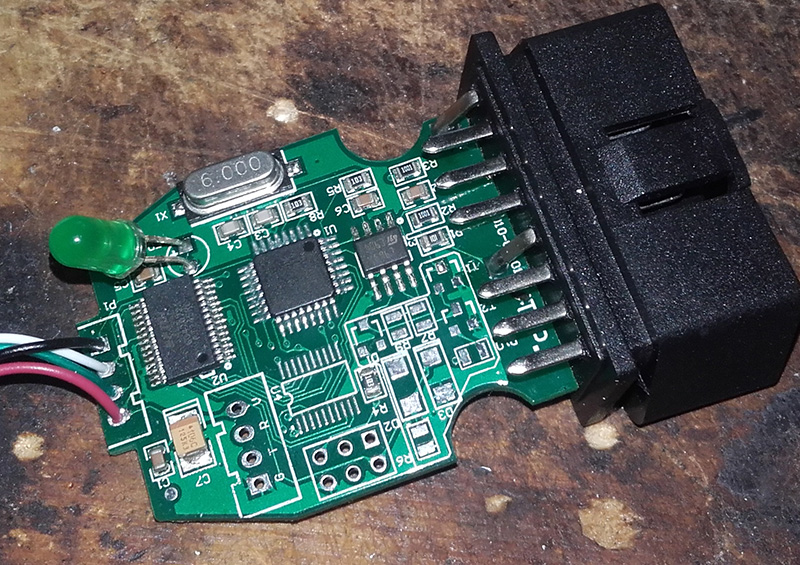
Your target is the Atmel Mega 8A chip. I use hot air gun for PCB rework to remove it.
Here, just to mention that two pins on the back side of the board are tight together. That is number 7 (K-line) and pin 3 (user application). And to prevent some strange behave I cut the connection: (100% sure you can go ahead without it)

- then put on programmer (Mini Pro TL866 in my case) via good TQFT32 socket:

SOFTWARE
In the package in the link above, you`ll find all you need(I use it on windows 7 32bit os)
What next?
- select the right chip type
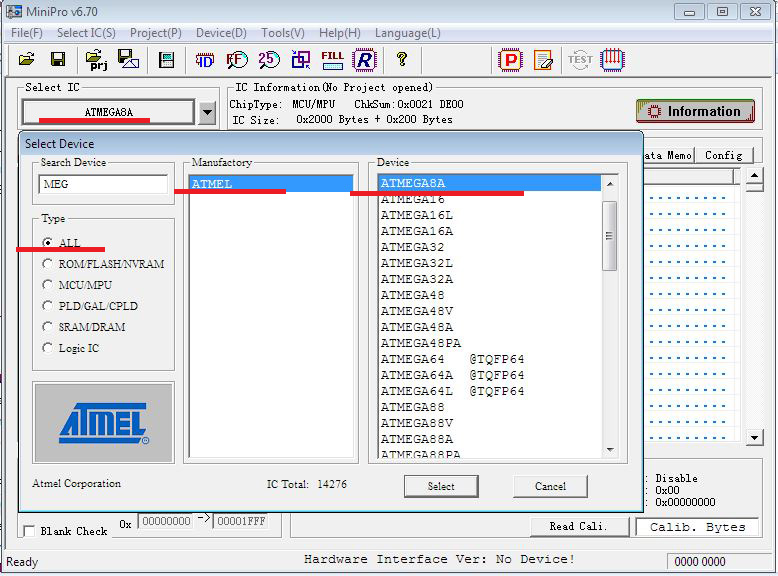
- after right chip is chosen, the fuses are automatically set. All data is fill with FF FF …

now push “PROGRAM” , and the chip should be erased. There is button “ERASE CHIP” but somehow only in that way I manage to delete the old data from it.
- now select:
FLASH.hex > and set it to be in “code area”. Choose to be INTEL HEX type.
EEPROM.hex > goes to “data memo ”

set the fuses like that:

and program the chip.
FTD FIX
Now, getting ready with the main chip, before solder it on place fix the FTD one.
- install MProg2.9
- open “Ft245RL.ept” , and connect the cable to the PC
Now you can push the blue “flash” , program it to the cable and then fix the serial number by VTacho ser-CD715B710A or you can edit the number by selecting edit:

And change it to CD715B710A. Then save and program it.
Or you can try “Ft245RL-Number_CD715B710A_added.ept” what suppose to have it ready set.
Then, read it again to confirm is right:

With that ready, solder the Atmel IC on place and test the cable. I get lucky and worked smooth after that. Hope that will do for you too! Cheers