Sunday,18-January-2015
Xantia II - front fog lights
EN one nice day i found that my car`s front fog lights are in bad shape and wasn`t working so much as expected. After replacement come the moment of harness plug problem. So, here is my solution:

Xantia II - additional cabin lights
EN Some of the Xantia models has originally 4 cabin roof lights, but mine was without


So i take 2 front from other old one and decide to make small DIY


Probably you see from the last picture that there was ready installed plug and harness. So, take a look carefully perhaps your have also. If ont, only then apply new cable line for it. Good luck!
Xantia II - Parking sensors
EN
Device is from ebay, and work quite nice. For the price tag I`m more than happy with it.
What to do:
- remove rear bumper: that will cost little effort by removing all screws under rear fenders what keep it(if remember right was 2), inside the trunk, behind box compartment(2×10mm, if remember) and all other visible in the trunk area.
- already removed, you can see ready prepared channels for cables. In my case there was hole under left stop/indicator unit, and from there it goes inside horizontal profile right behind the trunk end. Unfortunately that mean you need to put the unit on left side and pull one wire to right because there is the reverse lamp signal wire, or to put it right side and extend the sensor cables(equally). Or like me.. just to drill hole where you need it ![]()
So, here is some pictures from the main event:


Xantia - Logo door lamps
EN - that is one of the things in Ebay that you can spent money on. HINT - Replace the original controllers with better ones(again from ebay). I manage to almost put in fire my door because of that crappy original ones
![]()
![]()
![]()
![]()
Xnatia II Seat repair
EN The casual problem in that saloon fabric become into holes quite easy. Mine was not exception, so i found from UK car passenger`s seat cover and decide to give it try. The only one thing i found as “minus” was that it hasn`t heating carpet. Because the intervention was during summer i wasn`t so eager to buy one.. but i think in next hot weather days i will open again and add.


Monday,15-December-2014
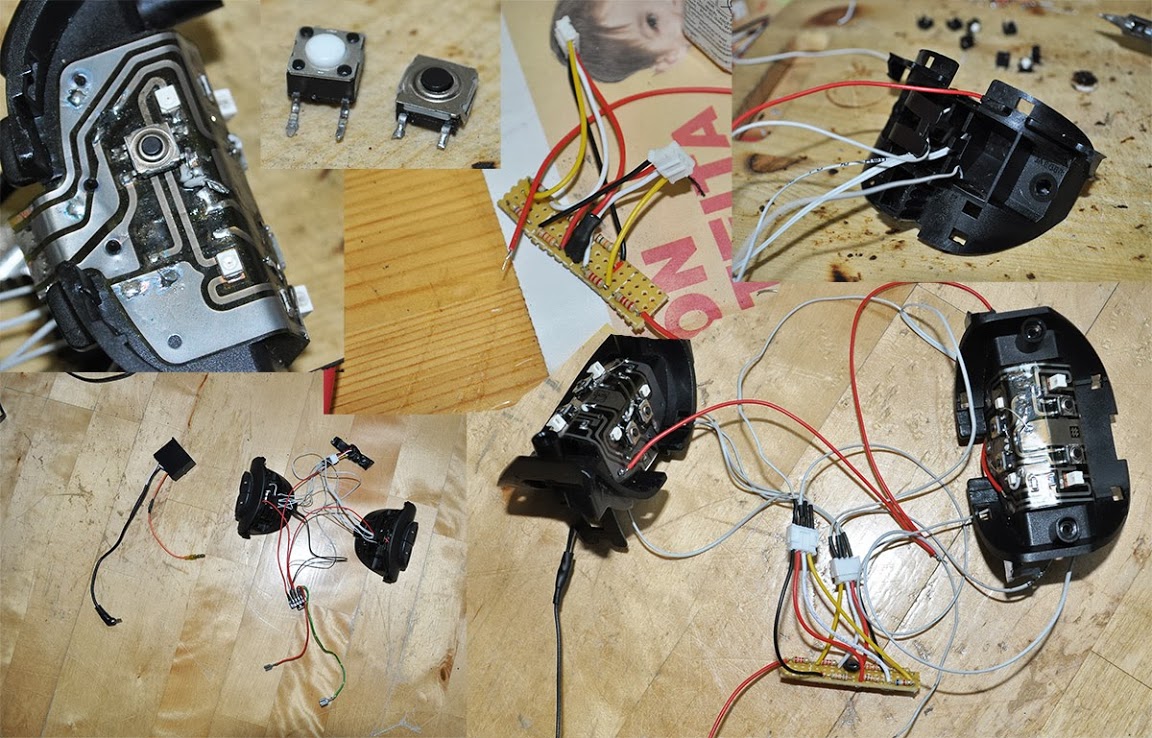
Xantia II - steering wheel audio player PIONEER control
Sony or Pioneer have resistor based wire remote. And because I bought one PIONEER DEH with 3.5mm plug for wire remote I start that project.
Internet investigation give me the list of the needed resistor values. The work was to replace resistors and redesign little the track relation and.. to enjoy the feeling of not touching the stereo when driving.
Schematic is enough I think to get all idea

Xantia II - dashboard


That was my first removing for that car,the reason was - burned backlight and signal lamps.
Xantia II - add relays for front main beam lights
Interesting - front fog lights are connected via relay, but why the hell the main one is only .. through the key? And here it come my idea


I remove the fuses. On every fuse position you have +12V coming from the light stalk, and the second is the exit to the lamps. I toke +12V straight from the battery plug to the relay, from there it goes to the output pin of the fuse. The input one from the stalk is used to control the relay. In that way the high current is removed from the stalk, and the main beam lights work much brighter. Job done!