Saturday,22-April-2017
Woodpecker GRBL CNC Board - Firmware Update
EN
If you own CNC 2418 machine(like me), or just have Woodpecker GRBL CNC Board you can update to GRBL firmware v1.1.
But if you`re “lucky” like me,when try via Arduino IDE, you`ll hit into: “resp. = 0×0d” or similar compiler error. That is because the Atmel chip is without boot loader. Even with Xloader you`ll hit the wall. So then what?
- open arduino IDE Serial window (115200 / Carriage return) and write > $$ , copy all values into notepad.
- remove any power cord/ source from your CNC board
- need arduino board(328P based), few thin wires and lot of patience. :)
- from Arduino IDE > File > Examples > ArduinoISP. Upload that sketch to your Arduino board.
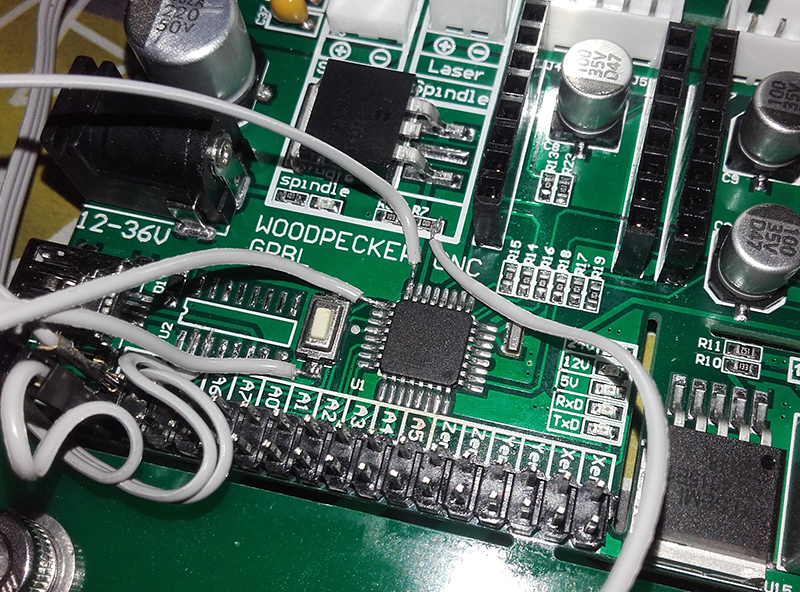
- solder the 4 thin wires as follow:
Arduino Uno / CNC SMD CHIP
pin 10 > CNC SMD pin 29
pin 11 > CNC SMD pin 15
pin 12 > CNC SMD pin 16
pin 13 > CNC SMD pin 17
And here is how I have done it:
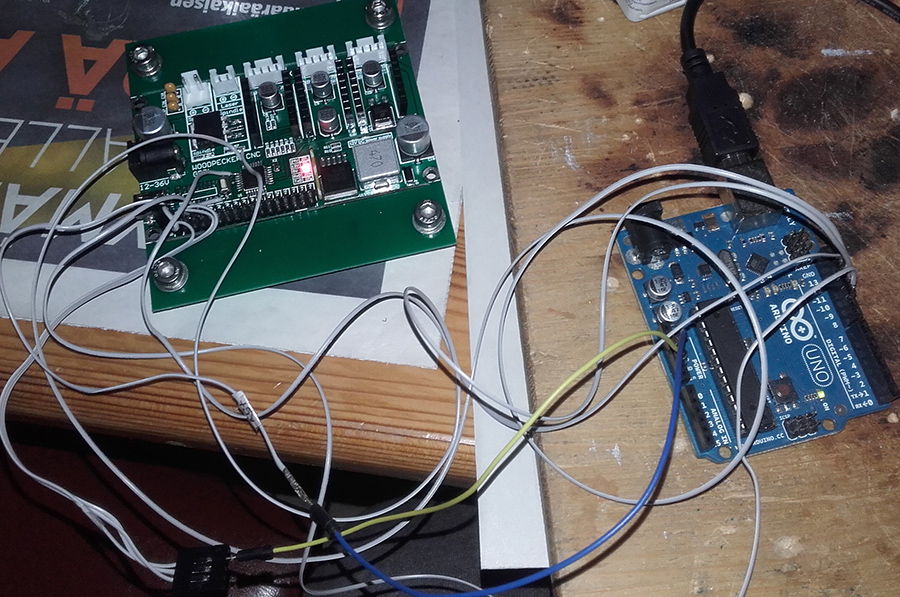
Just to mention, the original CH340 chip is missing from my board because I manage to burn it. It has nothing to do with the upload / update procedure so ignore it.
- when all that done remove the motor drivers, connect your arduino board again to your PC and also your cnc board ONLY! with the USB cable.
Select from arduino IDE :
* Tools > Board > Arduino UNO
* Tools > Burn bootloader
Wait until see > Bootloader done. Then, remove all soldered cables from your CNC board. Put back them drivers.
- now connect back your CNC board.
- download from the official wiki page GRBL v1.1 or you can grab that one: grbl 1.1j
Inside the only one thing I change was in CPU map file the register for the spindle/laser PWM. Inside now is 7,8Khz
- copy the “grbl” folder from the archive into Arduino main folder, to ” \libraries”
- open Arduino IDE > File > Examples > GRBL > grblUpload
- hit “Upload” and when start the compiling process push the reset button on the CNC board.
When see “Binary sketch size: xxxx bytes (of a 32,256 byte maximum)” release the RESET button.
- wait until RX / TX leds stop blink and upload is ready.
Open again arduino`s Serial monitor. Hit the cnc board reset button again and if all has gone well you`ll see: “Grbl 1.1f [’$’ for help]” . Now type again “$$” and set all variables as they where in 0.9j.
In case you wish to return back to v0.9j download from internet or click here.
If something goes wrong, always you can desolder the SMD chip and upload via programmer the OEM hex file. They can be found here
KEEP IN MIND now you need new code sender that properly support grbl 1.1.
Personally I use Candle: http://github.com/Denvi/Candle , but have to admit that the original Laser software (Engraver master) still works. The only thing that you loose in it : the settings window is empty. You can still set the laser power in percentage, and all other laser related stuff but motor speed and so sets will be empty.
That is. Enjoy