Sunday, 1-September-2019
Citroen C5 II mk2 Air flaps replacement - bad way, but goes..
BG - весия на български тук : http://clubcitroen.b … ic.php?f=179&t=76014
EN
Ok, hello first!
Probably you already have seen many tutorials about that problematic flaps in C5 mk2 / Peugeot 407. In later state PSA decide to replace them with reinforced ones. That`s good. But to remove the old broken ones you have:
option A : remove the whole dashboard, as before that drain the A/C system and some of the engine coolant. or
option B : make the ugly cut and remove them..
First you need the new ones:


What then? As in my case the flap that didn`t react to any change was the LH driver`s one I start there.
- have to remove the leg`s airbag. For that turn off any ignition, remove the negative lead from the battery and unbolt the two 10mm nuts from behind. Be careful, because the cable is not so long, so do not pull it.
It plug is situated somewhere behind the right metal frame holding the airbag. Unclip it from the place and the you can see on the opposite to the red plate side one rectangular clip. Put some flat screw driver there and pull the plug.
- now getting rid of the airbag, need to cut small portion of the decorative plastic (red marker) and remove the motor bolts:
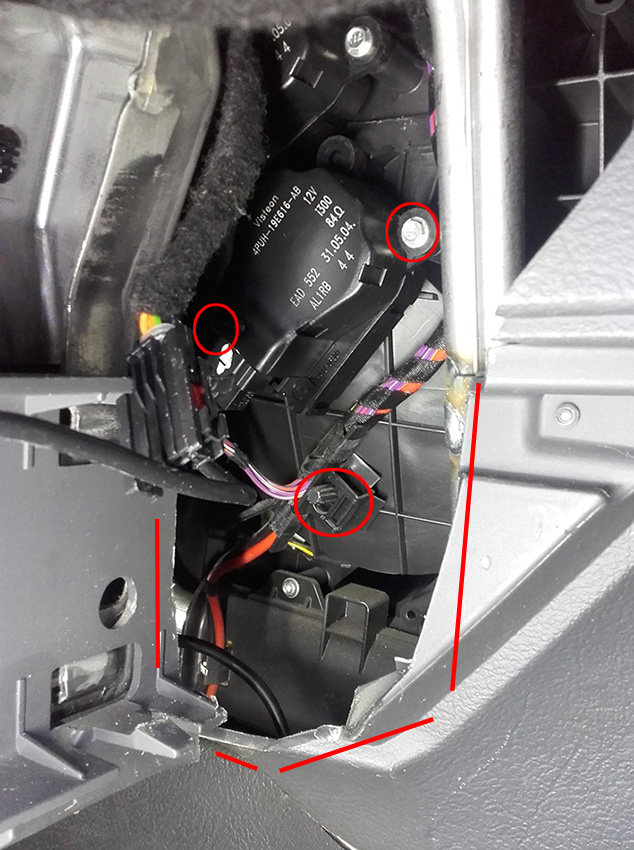
That gray plastic is soft so you can cut it easy with some blade cutter.
- after that removed, move the cables aside and here is like tip: use some strong pliers and pull toward the door that right metal vertical frame that carry the airbag. So, now you can take decision how to cut

in my case as cutter I have use the same blade knife and heat it with LPG heater to red and slice as much as I can

as a result I get:

then you get the reality:

you should see one area where the rubber flap border is moving: (red zone)
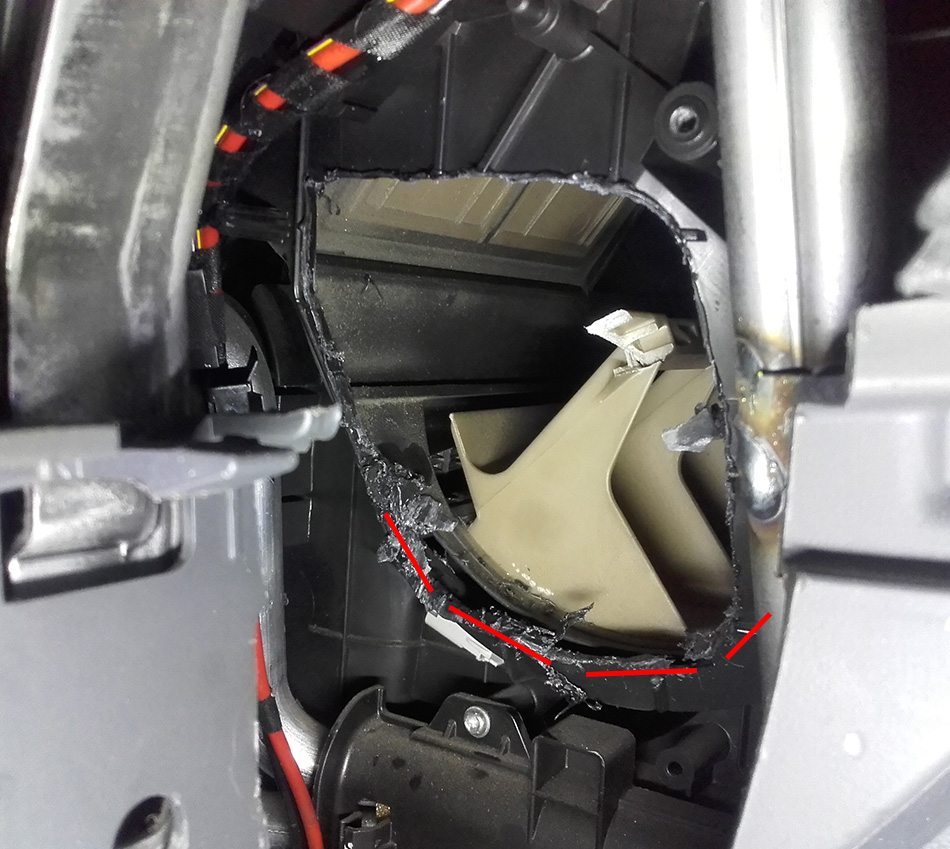
take in mind to keep it clean and with not any sharp edges because it will prevent normal flap move.
What is different in new and old you can see here:

- now time to fit the new one. As I mention before, you will get extra room by small twisting the bracket (marked in red)
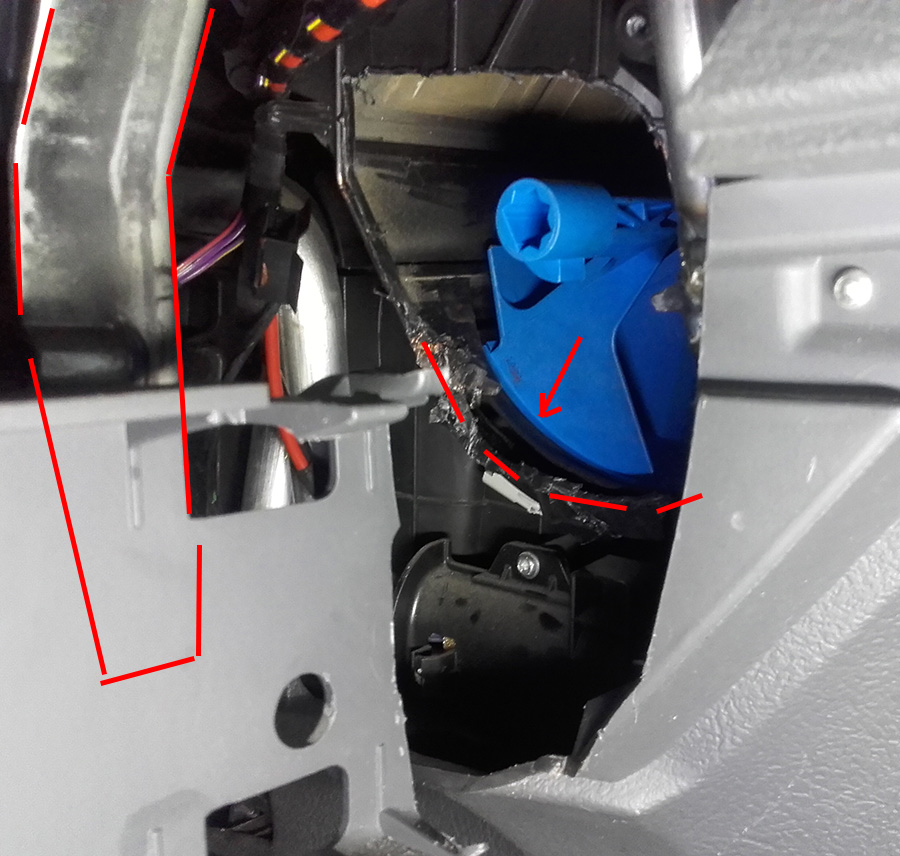
as well the new flap rubber border must go in that “channel” dedicated to it. Also, be careful to not unlock the lever that move the upper flaps.
- glue on some spots and try how it moves by hand:

confirming all is fine you can use some same kind plastic and weld it or use some special bond compound glue. It`s up to you

That`s all about ritght one. Then you can clue the cut part back and when ready to fit the airbag. But what about the left side?
- you remove the glove box. It should be 4-5 screws top and 2-3 under and it goes. Before pulling it out, please be careful and remove the lamp inside. The cable is not that long and can damage something.
- next in the list is the plastic pipe that is on the way:

That black crap hold the antenna cables so in my case was not possible to pull it out, just move it bottom left to not be on the way. So, after that was able to unplug the motor and remove it bolts.
- next you decide how to cut. Unfortunately here you also need to cut part of the decoration. That`s not as bad as sound because it is covered by the glovebox:

and as expected the story is not so much different as in right side:

- fit the new one, and again obey that rule for the rubber contour on the flap

- again, you can glue it little and try how it works by hand

and when you`re sure.. make it hard:

In my case, after fit the cut part on place it looked good and there was the “feeling” it just stay on right position and after glue applied it work good.
So, that was all about. Yes, it`s ugly that way, but still you can use your car during that “surgery”. Also, as bonus no liquid was removed. If you ask me, in case you have chance to do it right way - do it!
As hint:

I`ve made from aluminum square block to help me adjust and move the flap by hand. Sides are 8.6mm and it fit little loose so do not need to worry about. First one I`ve made 9mm and it fit perfectly also, but quite tight.
Good luck if you choose that way!