Thursday, 3-November-2022
DMU50 with TNC640 - how to configure CELOS timers and counters
EN
Did you have DMG Mori DMU50 machine with HEIDENHAIN TNC640 which also get as addition CELOS system? Yes?!
But have you wonder how to make both timer lines and numbers to start “doing” their magic?
I mean both marked with arrow below:
So, then that short article is for you.
Maybe your machine was already with preset parameters, but just in case will start with them. But before anything else:
!!! ATTENTION !!!
messing with system parameters without knowing what they do, can cause instability, poor performance or even needed for service team to fix what you`ve done! If you choose to continue, be aware that I`m not responsible for any further issues caused by your action over the system!
That been said.. Let`s continue.
I made some changes to the system parameters, so the machine make the following:
- on M30, M0 or when you push “machine stop” , it automatically unlock the door so you can open it
- when you just close the door it automatically lock it. Do not need to push any buttons.
How to do that? Stop the machine, change to T0 and open the program edit mode:
Then, press on the keyboard “MOD” button, and inside the number entry field type: 95148
That will let you to edit system parameters. Once again - careful !!!
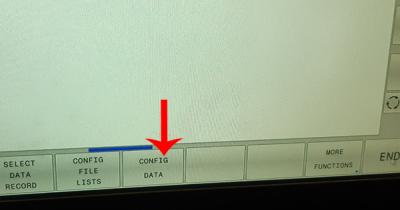
Find the button “config data” :
Select “System” ones, and press “FIND”
Search for “DoorNotOpenM30”
Next, do all marked with arrows same as the picture above. If not clear they should be:
CbGenCabDoorNotOpenM30 > false
CbGenCabDoorOpenM0 > true
CbGenCabDoorOpenNCStop > true
CbGenCabNoAutolock > false
Save that changes, and restart.. Now when machine end up on M30, or M0 will unlock the door. Same will happen if you push machine stop. After that, when you just close the door it will lock automatically.
Now, to make the timers run, you need to add right after the stock define block the following:
FUNCTION COUNT TARGET280
LBL 888
Set the target number to correspond of your target pieces, and of course you can use what ever label number suits.
In general the lower numbers as 1, 3…20..30.. are mostly used during inner loops in the program and is easy to make mistake. If you use 989 , 888, 898.. or similar you`re some what at the end of the “scale” and on the safe side.
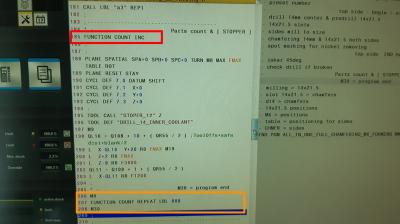
Next thing is to call that number at the end of the program, and increment the counter..
FUNCTION COUNT INC
M0
FUNCTION COUNT REPEAT LBL 888
M30
FUNCTION COUNT INC -> that increment the part counter. Sure enough if you make more than one you can change it to the other which give option to increment with desire number.. 2..3..10..100…
PLEASE! Remember to add M30 at the end , after the REPEAT LBL part. In that way any LBL calls defining positions, contours, and etc will work as expected.
When the program end up on M0 at the end will open the door. You can swap parts, close the door and push “start”. And the program just repeat..
In the manual been suggested to start at the beginning with:
FUNCTION COUNT RESET
FUNCTION COUNT TARGET280
LBL ….
That will reset the current counter value , set the target and start.. The issue here is that if you turn off the machine and start again, it will reset what ever value you already have.
Without “FUNCTION COUNT RESET” you get over that issue. Press MOD , set the counter to zero or what ever start value you like and go ahead.
Hope, that was useful tip! Good luck!


